Showing posts with label Pc And Other Tips n Tricks. Show all posts

How to Turn Your Android or iPhone into a Portable Retro Game Arcade


Whether you're looking to relive the past or experience the origin of gaming you missed in your youth, your Android or iPhone can take you back to Mario's salad days, the birth of the Final Fantasy series, and much more. Here's how to get started with retro game emulation and turn your phone or tablet into an arcade in just a few minutes.
While contemporary video games have come close to cinematic masterpieces, there's often nothing better than the fun and simplicity of retro classics. If you've never jumped into the world of emulation, this guide will take you through the very simple basics and have you up and running right away. We'll also take a quick look at ROM hacking so you can power up your emulation experience as well.
By the way, should you prefer to get this set up on your computer instead, check out this guide.
Before we get started, let's go over the basics. When you're talking about retro game emulation, you need two basics things: game ROMs and an emulator that can play them. A ROM is simply a copy of a game that exists as a file on your device. An emulator is an application that's capable of playing that ROM file on your device. Basically, you can think of a ROM as a virtual game cartridge and an emulator as a virtual console. Now that you know what you're dealing with, let's get started.

Get Your Emulators

Finding an emulator is pretty simple, but you may prefer some emulators over others. We're going to include our favorites for various platforms and, in some cases, a few alternatives if there's a good reason to check them out as well. If you are looking at an emulator we didn't recommend, remember that accuracy, performance, cheat code support, game pad support, and cross-platform compatibility are all things you'll want to consider.
How to Turn Your Android or iPhone into a Portable Retro Game ArcadeIMPORTANT NOTE ON THE DIFFERENCES BETWEEN iOS AND ANDROID: Emulation on iOS requires jailbreaking. We won't have links to our iOS emulator recommendations for that reason. All you need to do, however, is open Cydia (the jailbreak app store) on your jailbroken iPhone, iPad, or iPod touch and search for the recommended option. From there you'll be able to download it and use it no problem.
Additionally, third-party controller support (like the Nintendo Wiimote) works differently on iOS and Android. Controller support is generally built into the app on iOS, but on Android you need to add a separate app that connects controllers as input devices. (If you have an Android tablet with Honeycomb 3.1 or later, however, you can connect some controllers via USB as well without the need for a helper app.) We'll discuss controllers a bit later, but in the following sections assume any reference to controller support refers to iOS.

Easy Way To Turn Your Windows 7 Any Version To Ultimate


Hello dears today i am gonna telling you a new thing i.e. how you can convert your windows 7 any version to ultimate version easily without formatting your pc.we know that Windows 7 ultimate is that such version where you can everything rather than the other version of windows 7 such as-

  • Personalization
  • Different Themes
  • Windows Media Center and many other functions

Generally now a days whenever we buy our pc or lappy from the store we can see that there is the OS of windows 7 Home Basic edition which is pre-builted by the respected company and in this edition you cant get the functions that I have listed above.Now i can guess that you are little bit excited how to convert your pc OS to windows 7 Ultimate edition without formatting your lappy or pc.

Best way to remotely control your desktop PC, MAC, iPhone, tablet PC, Android


Its the best application to control Windows or Mac, from iPhone, Android or even remotely control your PC or MAC from another MAC or PC. As you can see in the video, you can not only play videos or audio files but also attempt to play something 3D.

From what I did not realize, however, is that Splashtop has also launched an application for Windows that allows us to connect to another machine with Windows or OS X.


5 Reasons Why You Need an Android Tablet


The growing market for tablet computers is a confluence of two events. The first is portability. The more dependent we are on technology for information, directions, socializing, entertainment and advice, the more essential it becomes outside of the home. The second is the advance in the technology itself. The better and more compact the processing power, the more capable tablets become at delivering the multimedia experience we require.

htc-scribe-android-tablet

However, the demand for tablet computers has led to a saturated market. In recent years, nearly every electronics provider in the industry has developed their own version of the tablet, each with their own size, specifications, and accessories. At times, it becomes difficult to sift through the surfeit of choices available to a consumer. On the other hand, when it comes to operating systems, the choice is much simpler. Almost all tablets fall into one of two classes: the proprietarysoftware offered on the Apple iPad, and the Google developed Android. The following are 5 reasons why an Android Tablet is the superior product: 


1. Price and Selection

The cost of an Android tablet is relatively cheaper than competing models. Furthermore, outside of the iPad, nearly all major tablets use some version of the Android operating system, providing a far greater selection not only in hardware but in size. Android tablets can be found in 5 inch, 7 inch, 9 inch, and 10 inch models from a panoply of providers including Dell, Samsung, Acer, Motorola, Sony and LG.
An Android tablet also provides better value than a laptop or smartphone. A tablet combines the processing power and screen size of a laptop with the weight and affordability of a smartphone. 

2. Customizable Software

The fact that Android is an open source software means that there are a significant number of apps you can download, many of which are free. Apps are essential to increasing the utility and function of a tablet, and giving developers the freedom to create them will help the marketplace continue to grow and expand for the foreseeable future.
Apps also provide increased customization, allowing you to organize your tablet as you see fit, as opposed to the more inflexible iOS installed on the iPad. Customized software can be installed on top of the Android software, allowing you to alter desktop themes, icons, and widgets. This is why Android is the preferred software for many tablet providers, as they allow manufacturers to add and tweak the interface to present a more marketable product. 

3. Flash Capability

Much of the content on the internet is flash based. This includes web pages, games, video clips and full movies. As a result, in order to fully explore the internet it is imperative that you have an operating system capable of playing flash such as Android. Since both Apple’s iOS and Linux’s webOS cannot play flash, this may result in a far more limited browsing experience.

4. Multi-Functionality

Part of the appeal of a tablet is the ability to connect to other devices such as an HDTV. With USB, SD, and HDMI ports, you can connect your tablet to another computer or watch movies on a high definition big screen. Apple, in choosing to make their device wireless dependent, neglected the fact that many electronic devices, televisions in particular, are not equipped with internal wireless cards. Many Android tablets also offer the option to serve as a router or tethering device, sharing an internet connection between multiple devices. 

5. Hardware Issues

Android tablets typically have replaceable batteries, whereas an iPad must be shipped back to the manufacturer to have the battery replaced by a technician. Contrary to their smartphones, Apple tablets also have notoriously poor cameras, scoring consistently worse than Android tablets in comparison.

Best of IFA 2011: Giant Smartphones, New Takes on 3D, and Many More

Samsung Galaxy Note The Samsung Galaxy Note, a peculiar half-tablet, half-phone device equipped with a stylus. Corinne Iozzio

It's an entirely different kind of gadget lust felt when you know that the thing you're drooling over is dogged by the horrid words "Europe Only," or "U.S. release details pending." Here at PopSci, we get that a lot, but never is it more palpable than the one time a year we cross the pond for the annual IFA electronics smorgasbord in Berlin.

This year's IFA is just wrapping up, which means it's time to look back on the whirlwind of the last few days: what looked great, what didn't, what got us excited, and which technologies we're most excited about. The big themes this year were convergence, new ideas about 3-D, and thin everything--two of those three are represented in the Samsung Galaxy Note pictured above. Stay 'til the end for a couple show-floor sights that turned more than a couple heads.

Increase Your Website Sales and Security by Using the GeoTrust QuickSSL Premium Certificate

In today's world of rapidly expanding technology, millions of people are using e-media to buy and sell products and services. Thus, e-commerce is proving itself to be an important component of business strategy. For reference, any form of transaction in which the parties interact electronically rather than by direct physical contact is known as e-commerce. To put it simply, it is an act of buying or selling on the Internet or other communication networks. The development of online shopping, telephone banking, credit cards, data mining, data warehousing, enterprise resource planning (ERP) systems and World Wide Web (Internet) are just a few of the revolutionary components of electronic commerce.

Still, millions of people face security problem for sharing confidential data on the Internet. That's why they will think twice or leave websites which do not make their security protocols easily and boldly evident. If your site is selling products to the public, it is crucial to develop trust with your users by securing your website with an SSL Certificate. The GeoTrust QuickSSL Premium certificate is the least pricey option for an SSL certificate that secures both www and non-www domains and is from a trustworthy name - as of January 2011, the Alexa Netcraft Index suggested it's the most widely used brand of SSL on the top 1 million sites. It comes standard with premium warranty protection and unlimited server licenses, making it the simple choice for a fast and credible SSL solution.

When you display GeoTrust SSL certificate, you inform your users that you value their information and it's secure. The GeoTrust SSL Premium certificate also builds trust in end users that their data will not be disclosed to anyone; this faith creates a valuable and lasting relationship of trust. In this way, your online sales will increase exponentially.

so Secure your fully qualified domain name, including both the NON-WWW and WWW details, with the Geo Trust QuickSSL certificate.

Guide To SSL Certificates

Secure Socket Layers (SSL) are protocols that allow secure communication between different parts of the network. This allows browsers to connect to web sites and servers are hosted. All the sites hosting eCommerce trusted to use this technology to guarantee the protection of consumer information phishing, hacking and other of stealing. That is why they are trying to create an online business, it is essential to learn about SSL certificates.

How SSL certificate work?

To send the form to the network (such as credit application), the browser must first request a protected page, the web server. Subsequently, the server sends the public key certificate for an SSL site. The browser will then ensure that the certificate is valid and reliable by the party.

Once verified, the browser uses a public key to create and encrypt a random symmetric encryption key. Then sent to a Web server with the data in encrypted form and the https URL. Once received, the web server uses a private key to decrypt the symmetric encryption. Decrypts the symmetric key and the form data and URL.

Required format and data online (HTML) is sent to the Web server encrypted with a symmetric key. The browser then decrypts the data and documents using a symmetric key and displays the information to the recipient.


thesslstore.com is one of the largest SSL resellers in the world, offering SSL Certificates for Websites worldwide. Above and beyond services include a 30-day Money Back Guarantee, Price Match Guarantee (lowest cost), Customer Royalty Program, and 24 X 7 Platinum Support System via various communications: email, live chat, and telephone. Join IBM, NASA, the United Nations, and Microsoft in trusting The SSL Store's solutions. Secure your fully qualified domain name, both the NON-WWW and WWW versions, with the Geo Trust QuickSSL Premium with a fantastic organization at an affordable cost.

Logo Creator Software - Should You Actually Use One?

When it is a situation of spending money, we want to ensure that the money paid is worth every bit! There is nothing wrong if you become demanding when spending money on a certain thing. Imagine! You just bought a food processor but suddenly something went wrong with it. In such a situation, you or anyone would immediately contact the manufacturer so that he can provide with another equipment that is going to work properly. Now, we can completely understand that when we invest our money into something, we expect to get its entire worth in the best possible way. Another aspect that can be understood through such a scenario is that some way or the other we need the help of a professional because such an individual will have all the knowledge of tackling a particular situation. If you have an organization, and you need to use a nicely-designed logo, then it is likely that you will hire a professional for the same. Designing the logo on your own is not a bad idea, but then there are risks involved since you would not have all the knowledge needed to design a logo. Hiring a professional designer for this purpose can cost a lot of money, which is not affordable by all the companies. For small scale firms using a free logo maker remains as an only option! However, should you really get a free download-able logo maker software?

It is important to create a logo design, which is futuristic! Since the trends keep changing, so the design should be such so that it can cater to the needs of future demands. However, this is not possible for a free software to do! It does not work like a human to understand what it should do to create futuristic designs.

A software does not understand which particular color will work at the best for a company.

A professional designer will carry out a thorough survey about what competitors are doing, but a software will be unable to do so!

Do you think you really want to purchase a software now? No one will guarantee you that the software you will use will fetch amazing results. Will a software be a good investment? Will it be able to meet the company requirements to the fullest? Will it be capable in working successfully in the long run? Find your answers to these questions, and then decide whether you should actually be using a software or not!


Harley Willson, an experienced author has been a writing buff for decades and accomplishes his dreams in the field of writing. He has written various articles on logo creator and logo designer software.

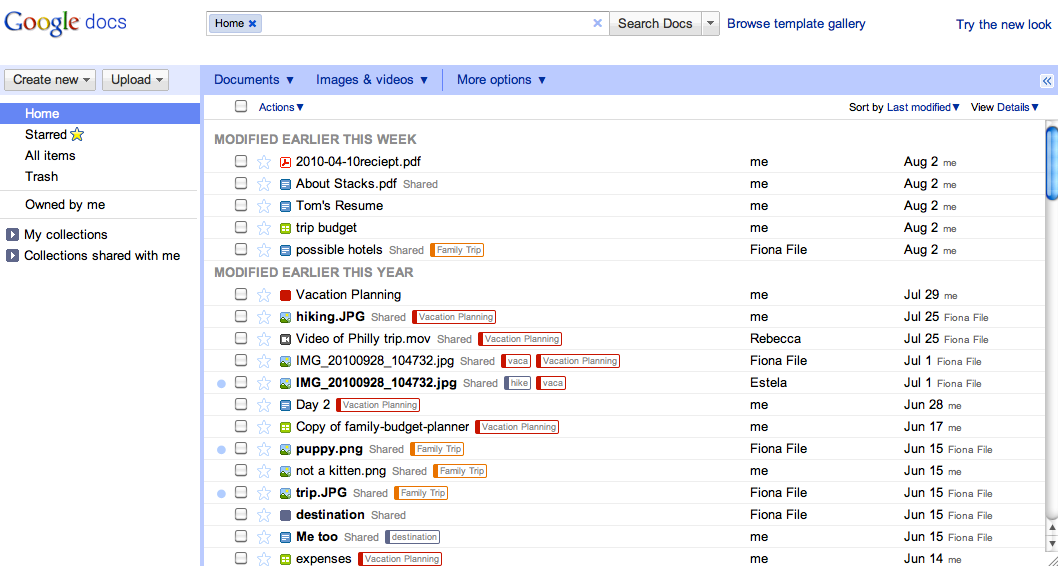
Try out a new look and keyboard shortcuts for your documents list

As part of our effort to provide an improved and consistent web experience across Google products, we’d like to invite you to try out a new look for the documents list that's rolling out to users over the next few days. If it's available to you, you'll be able to preview the new look by clicking on Try the new look under the gear icon in the upper right. You’ll be able to return to the classic look using the same menu.


Classic look

New look

While using the new interface, you may want to see more of the items in your documents list on the screen at one time. To do this, click on the gear icon in the upper right and go to Documents settings. Under Row height, you’ll be able to select the option to use a denser view.

As part of this new look, we’ve also added keyboard shortcuts to help you easily navigate your documents list without a mouse. For example, when selecting a document, use the ⇓ (down arrow) to move down the list and the ⇑(up arrow) to move back up. Once you find the item you're looking for, type a to open the Actions menu. Then, use the ⇑ and ⇓ arrow keys to navigate the Actions menu, and hit to select an action.

The Create new shortcuts are also convenient for creating new docs while you’re working. Simply hit Shift + T to create a new text document, Shift + S to create a spreadsheet, or Shift + C to create a new collection.

Can't remember all those shortcuts? Just remember the question mark. Type ? when you’re not in the search bar, and a window will appear showing all available shortcuts.


These shortcuts will only be available if you’re using the new interface. Keep an eye out for more changes to the new interface as it evolves, and make sure to tell us what you think about the new design in this brief feedback form so we can continue to improve your experience.

Give your templates a refresh in the new document editor

We continue to add new features like pagination and discussions to the new document editor, and we want to make sure you always have access to all of the latest functionality -- whether you’re creating a new doc from scratch or using a template from the gallery. As part of this effort, we’re removing Google Docs templates created in the old document editor from the Google Docstemplate gallery.

Starting on September 30th, old style templates will remain accessible to their owners and to anyone who the template has been shared with, but they will no longer be visible in the public gallery. This will only apply to the public Google Docs template gallery; templates created in Google Apps domains will not be affected by this change.

You can ensure your templates remain in the gallery by converting them to the new document editor. Just follow these simple steps:

  1. Open the document from your documents list
  2. Click the Preview link at the top of the document to see what it looks like in the new editor
  3. From inside the preview window, click the Update this document link
When old style templates are removed from the gallery on September 30th, the template owners will still be able to restore the templates to the gallery by upgrading them to the new editor.

By making this change, we hope to bring the best possible experience to more documents.

Great PC Tricks In This Video-Just Watch

How to lock drives on XP


You can hide any of drive(s) by just adding two keys in windows registry
goto start>run
Type regedit and press enter. This will bring you to the registry editor.To hide any drive you have to follow these 2 steps

STEP1: Hidding Drive
goto HKEY_CURRENT_USER\Software\Microsoft\Windows\Curre ntVersion\Policies\Explorer now create a new DWORD value NoDrives and set its value as 2^(Alpha Number of Drive Letter-1)
where Alpha number are simple counting of alphabets from A to Z as 1 - 26
for example: to hide C drive
Alpha number of C is 3 so 2^(3-1) = 4 (decimal value)
If you want to hide more than one drive than calculate the value of each drive as explained and then set sum of those numbers as value

Step2: Prevent Access to the drive
Now as we have make our drive invisbble but it is still accesible so to lock the drive we will create another DWORD value at
HKEY_CURRENT_USER\Software\Microsoft\Windows\Curre ntVersion\Policies\Explorer
create a new DWORD value NoViewOnDrive and set its value same as you have calculated for hidding the drive(s)

Now your drive is locked. If you want to unlock and unhidden the drive then just delete these two keys and your drive is again accessible. You can also create two .reg files one for hidding and locking and another one for unlocking and unhidding .


or


1. Go to Start > run > type "diskpart".
a dos window will appear with following discription.
DISKPART>

2. then type "list volume"

this will look like it

Volume### Ltr Label Fs Type Size Status Info
-------------- ---- ------ --- ----- ---- ------- -----

Volume 0 F DC-ROM
Volume 1 C NTFS Partition 7000MB Healthy
Volume 2 D soft NTFS Partition 8000MB Healthy
Volume 3 E Porn NTFS Partition 8000MB Healthy


3.if u wanna hide drive E then type "select volume 3"

then a message will appear in same winwods { Volume 3 is the selected volume}

4.now type " remove letter E"
now a message will come { Diskpart Removed the Drive letter }
sometime it requires the reboot the computer .

Diskpart will remove the letter .Windows XP is not having capabilty to identify the unkown volume.

Don afraid ur Data will ramin same .
to Come backe the Drive repeat the process . but in 4th step whish is shown in this post replace " remove" to "assign"
i mean type " assign letter E"

PLAY DVD'S IN WINDOWS MEDIA PLAYER WITHOUT ANY SOFTWARE


 Windows Media Player in Windows Xp don't come standard with DVD playback enabled. Microsoft suggested that additional software should be installed like Power DVD to enable the support.Here is a way to overcome this problem:

1.goto the start menu and select run.
2.In the run command type regedit click ok to goto registry editor.
3.Now navigate to the following path: HKEY_CURRENT_USER/Software/Microsoft/ MediaPlayer/Player/Settings.
4.On the right hand side right-click and choose new and then string value.
5.Rename the string value as EnableDVDUI and then double-click on EnableDVDUI
and change the value to yes.
The next time when you start Windows Media Player you should be able to play DVD’s when you have DVD drive in your computer to read DVD'S . You will not be able to play DVD movies in a CD-ROM drive.

Know full details of your computer


1. Start Command Prompt ( Start > Run > CMD )
2. Type Systeminfo and press Enter.

To save this details to a text file :

3. Type Systeminfo>C:\systeminfo.txt

This command will save a text file named systeminfo in C drive.
You can change the path for you use.

OR

1. From the Start menu, select Run.Type msinfo32.exe and press Enter.
You will have everything listed there.

To know more,
From Start menu, select Help and Support.
Under Pick a Task ,select Use Tools to view your computer information and diagnose problems.

From the left pane, select Computer Information and select relevant category from the right pane.

Folder Without Name

Make a new folder and rename it with press (alt+0160) And (alt+255)..know its make a folder without any name…ok dude..if u want to make an invisible folder then go 2 the properties—>customize—->change icon—>use blake space for this–>apply–>ok–>ok……

Windows Tricks & Tips


1) Disabling Display of Drives in My Computer :
This is yet another trick you can play on your geek friend. To disable the display of local or networked drives when you click My Computer go to :
HKEY_CURRENT_USER\Software\Microsoft\Windows\CurrentVersion\Policies\Explorer
Now in the right pane create a new DWORD item and name it NoDrives. Now modify it's value and set it to 3FFFFFF (Hexadecimal) Now press F5 to refresh. When you click on My Computer, no drives will be shown. To enable display of drives in My Computer, simply delete this DWORD item. It's .reg file is as follows:
REGEDIT4
[HKEY_CURRENT_USER\Software\Microsoft\Windows\CurrentVersion\Policies\Explorer]
"NoDrives"=dword:03ffffff
2) Pop a banner each time Windows Boots :
To pop a banner which can contain any message you want to display just before a user is going to log on, go to the key:
HKEY_LOCAL_MACHINE\SOFTWARE\Microsoft\Windows\CurrentVersion\WinLogon
Now create a new string Value in the right pane named LegalNoticeCaption and enter the value that you want to see in the Menu Bar. Now create yet another new string value and name it: LegalNoticeText. Modify it and insert the message you want to display each time Windows boots. This can be effectively used to display the company's private policy each time the user logs on to his NT box. It's .reg file would be:
REGEDIT4
[HKEY_LOCAL_MACHINE\SOFTWARE\Microsoft\Windows\CurrentVersion\Winlogon]
"LegalNoticeCaption"="Caption here."
3) Exiting Windows the Cool and Quick Way

Normally it takes a hell lot of time just Shutting down Windows, you have to move your mouse to the Start Button, click on it, move it again over Shut Down, click, then move it over the necessary option and click, then move the cursor over the OK button and once again (you guessed it) click.This whole process can be shortened by creating shortcuts on the Desktop which will shut down Windows at the click of a button. Start by creating a new shortcut( right click and select New> Shortcut). Then in the command line box, type (without the quotes.)

'C:\windows\rundll.exeuser.exe,exitwindowsexec'

This Shortcut on clicking will restart Windows immediately without any Warning. To create a Shortcut to Restarting Windows, type the following in the Command Line box:

'c:\windows\rundll.exeuser.exe,exitwindows'
This Shortcut on clicking will shut down Windows immediately without any Warning.

4. Ban Shutdown
HKEY_CURRENT_USERSoftwareMicrosoftWindowsCurrentVersionPoliciesExplorer
NoClose(String Value)=1

5. Start Screen Saver when the mouse is at Top Right Corner
HKEY_CURRENT_USERSoftwareMicrosoftWindowsCurrentVersionScreenSavers
MouseCorners(String Value)=-Y-N

6. Change Internet Explorers Caption
HKEY_LOCAL_MACHINESoftwareMicrosoftInternet ExplorerMain
Window Title(String Value)=String

7. Making Explorers Toolbar Fancy
HKEY_CURRENT_USERSoftwareMicrosoftInternet ExplorerToolbar
BackBitmap(String Value)=Path of BMP Image File.

8. Changing Default Background Files Directory For DesktopProperties.
HKEY_LOCAL_MACHINESOFTWAREMicrosoftWindowsCurrentVersion
WallPaperDir(String Value)=Path Of Image FilesDirectory.

9. Remove Documents From Start Menu
HKEY_CURRENT_USERSoftwareMicrosoftWindowsCurrentVersionPoliciesExplorer
NoRecentDocsMenu(Dword Value)=1

10. Sometimes, even after programs are uninstalled, or dueto the files
being deleted instead of uninstalled, the entry in the Add/RemovePrograms
list do not get removed. To remove them from the list:
1. Start the Registry Editor and navigate to
HKEY_LOCAL_MACHINESOFTWAREMicrosoftWindowsCurrentVersionUninstall.
2. Locate the program entry here and delete it.

11. Cracking Windows XP Passwords

Windows XP is said to be the most secure operating system, it is said to be an invulnerable operating system. 80% of the computer users in this world use Windows XP. Microsoft has said that Windows XP has will help you to have a safe and secure computing experience. I am completely agreeing with this, but I want to tell that Windows XP is not invulnerable; there are some security holes in this operating system. Here, I will be discussing a security hole. Through this security hole, you will be able to penetrate the administrator password.

NOTE: Please note, here, I am assuming that your Windows XP box has an administrator password.

First of all, get a Windows XP bootable CD, if you don’t have one , please read the section Hacking Techniques – Beginners.
Okay, after you get a Windows XP bootable CD, place it in your CD ROM or CD Re-Writer, now boot your computer through CD.

In Windows XP, during the splash screen, press F4 and then choose boot from CD.

Now, you will see a message on the screen saying that
“Press any key to boot from CD”

Once you get into the setup, you will observe that setup is inspecting your system and loading setup files. Once you get the Welcome to Setup screen, press ENTER to setup windows. The Licensing Agreement will be displayed next press F8 to agree it. The next screen will give you an option to do a repair. You will see that “If one of the following Windows XP installations is damaged, Setup can try to repair it”

Use UP and DOWN arrow keys to select Windows XP Installation and then press R to begin the Repair Process.


“Your Computer will reboot in 15 seconds”

During the reboot, do not press any key to continue because if you do then the normal boot up process will start.
Setup will automatically start and you will observe that Installing Windows is highlighted.

You have to keep your eye on the lower left side of the screen, when you see “Installing Devices”, press SHIFT+F10, this is the security hole in this operating system, you will now see a command console which will enable you to access your system.

Now, you have to type NUSRMGR.CPL and then press enter, to execute your command. Believe it or not, you will now gain a graphical access to your User Account in the Control Panel.

Now, you can do anything, you can change the passwords of the accounts or you can even remove the passwords. After you have completed the manipulations, go to command prompt and type exit. Wait for the repair process to get over, then reboot your system and find the change.

You can also stop the password prompt, for this you must follow the same procedure given above. But, only one thing you have to change, in the command prompt type in control userpassword2, a screen will popup, choose log on without being asked for the password.

NOTE: After making changes in the command prompt or through the command prompt, always exit using the exit.
Related Posts Plugin for WordPress, Blogger...
Share